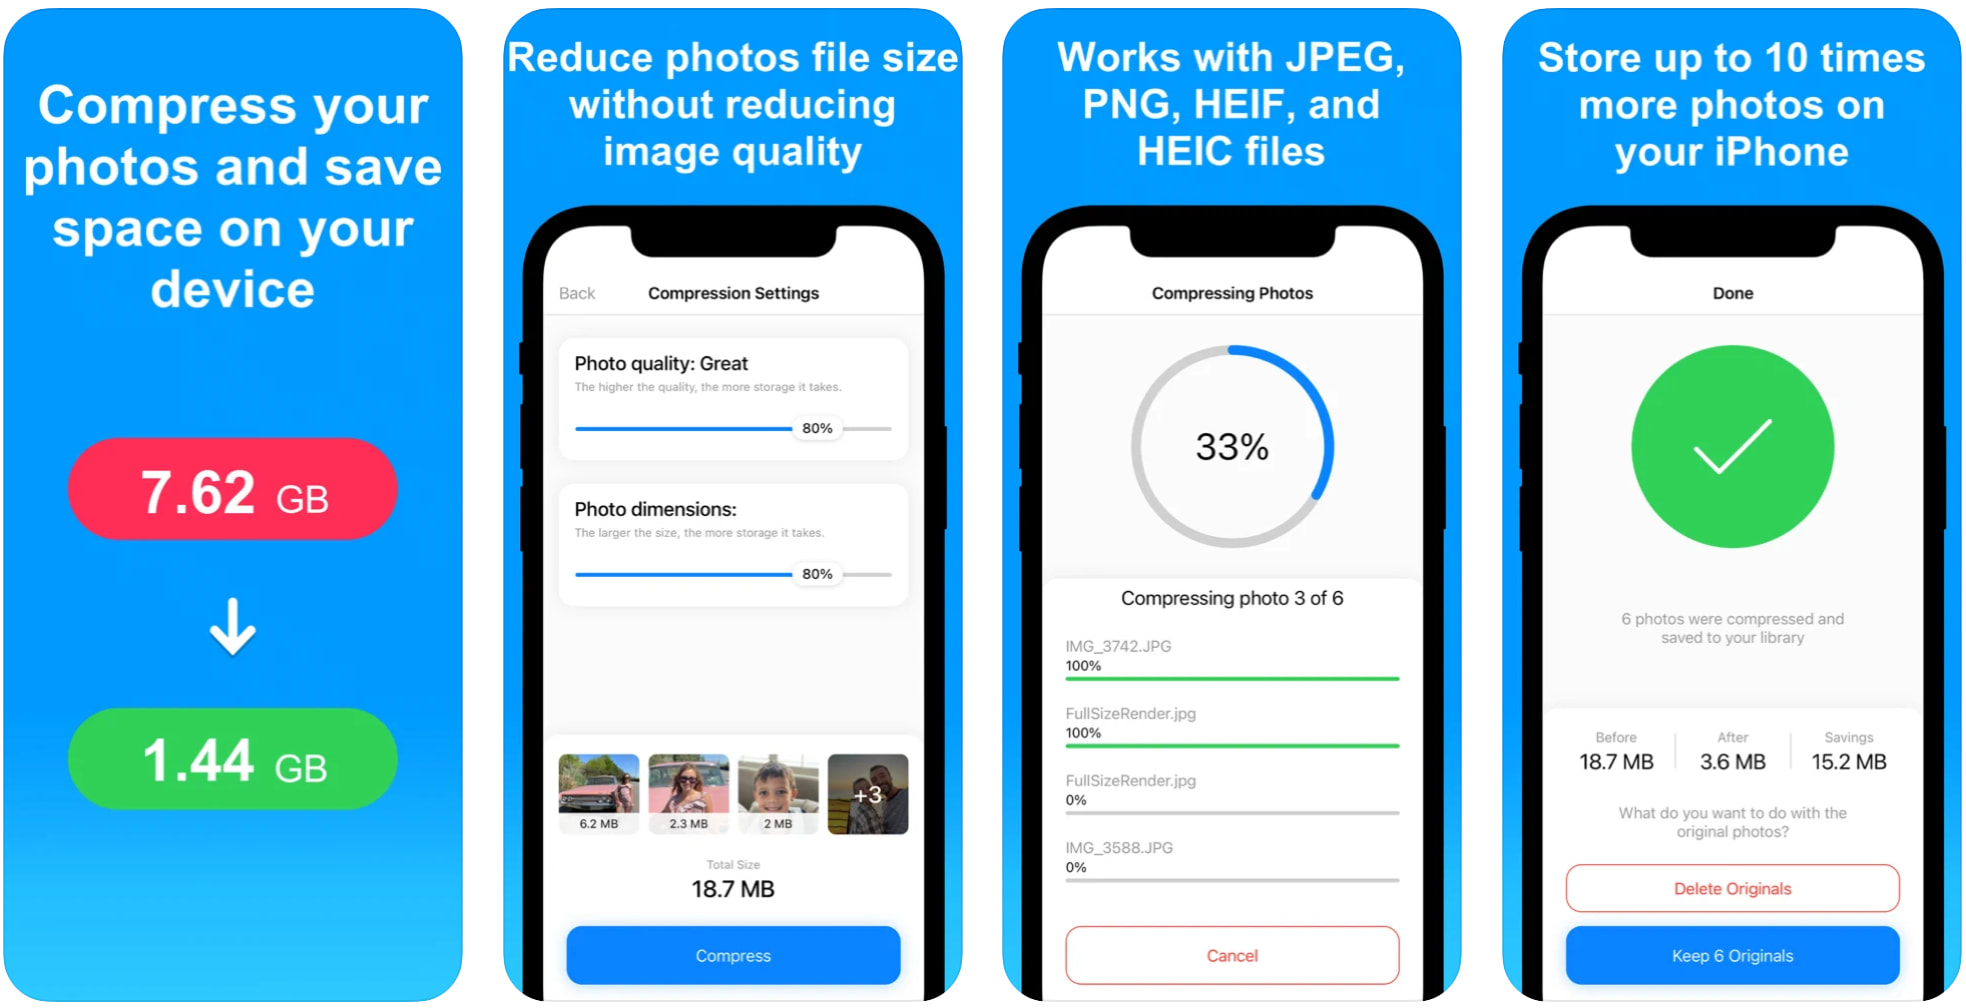
Save storage space on your iPhone or iPad by compressing your photos and reducing their size without reducing their quality.

4 reasons to use this app
- Save space on your iPhone or iPad by reducing photos file size
- Optimized for best image quality possible
- Shrink photos to share them faster with friends and family
- Quickly and easily compress photos before posting them to social media
- Compressed images are automatically saved to a newly created album called “Compressed Photos”
- Works with all PNG, JPEG, HEIF, and HEIC image files
We love feedback
If you like this app, please consider taking a minute to rate it in the App Store. If you don’t like the app, please contact us and let us know how we can make it better.
Frequently Asked Questions
I bought the Pro version but I still see ads, or all features aren't unlocked. What can I do?Open the app and go to the app’s settings. Tap on the Compress Photos Pro tab at the top. Tap on the Restore Purchase link.
Assuming you did purchase the Pro version to begin with, this will unlock all Pro features.
How do I find my photos once they have been compressed?
Compressed photos are automatically saved to your library as well as in an album called Compressed Photos. Open the Photos app on your device and look for that album.
To find this album, open the Photos app, tap on the Albums tab at the bottom, then tap on See All in the upper right. This will display all your albums and the Compress Photos album should be in there.
If you can’t find this album in the Photos app, it means you didn’t give the app full access to your photo library. Without full access, the app cannot create the Compressed Photos album. To fix this, open the Settings application (the grey icon on your Home Screen), scroll down to the Compress section, tap on the Photos tab, and select All Photos.
I see a blank screen when trying to select photos. What can I do?
This happens because you didn’t grant the app access to your photo library. In order to fix this, simply open the Settings app, scroll down and tap on the Compress cell, tap on Photos, and finally, make sure to select All Photos.
This will allow the app to view your photos but also save processed photos to your library.
I can't select new photos to compress.
This is because you didn’t grant the app full access to your Photos library. To fix this, open the Settings app, scroll down to the Compress section, and tap on Photos. Then make sure All Photos is selected.
How do I delete photos from the app after compressing them?
Photos can be deleted from the Photos app. If you delete them from the Photos app, they will be deleted from the Compress Photos app as well.
But really, the fact that you are wondering how to delete photos from the app suggests that you didn’t grant the app access to all your photos to begin with. To fix this, open the Settings app, scroll down to the Compress section, and tap on Photos. Then make sure All Photos is selected.
The app will not be useful if you don’t grant it access to all your photos.
Is there a limit to how many photos can be compressed at once?
Yes, for performance reasons, there is indeed a limit, which we set to 100 images. If you use an older device such as an iPhone X, the app will warn you when it thinks you are compressing too many images at once. As a rule of thumb, it is best to compress 30 or less images at a time. Newer devices such as the iPhone XS are capable of processing more images at once.
My iPhone crashes or freezes when I use the app. What can I do?
This is a clear sign that your iPhone is under heavy load. To avoid this, make sure to compress less images at a time. It’s also a good idea to force quit some applications that may be running in the background.
The app tells me it can't compress the photo more than the original file. What can I do?
First thing to do if the app tells you it can’t compress the photo is to adjust photo quality and dimension settings further down. For example, cut down quality to 60% and video dimensions to 60%.
If you adjusted the compression settings down, and the app is still telling you it can’t compress the photo further, then there is nothing else you can do. It doesn’t mean the app is not working. It just means there is nothing the app can do for that specific photo. This is usually the case for photos downloaded from social media (ie. from Instagram, WhatsApp, etc) where photos are already really compressed.
If you believe the app is not working as it should, a good way to test this is to shoot a new photo using your iPhone Camera app, then open this photo in the Compress Photos app. Reduce quality and dimensions and compress the photo. You should see significant savings. This is the proof the app works.
Question about Compress Images?
Send me an email and I’ll do my best to reply in a timely manner.